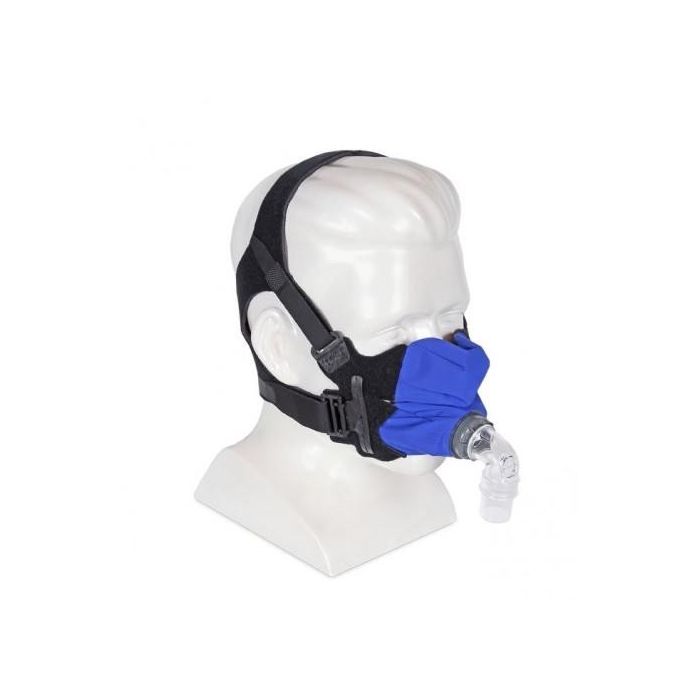
SleepWeaver Anew Full Face CPAP Mask & Headgear
SleepWeaver Anew Full Face CPAP Mask & Headgear

A SleepWeaver Anew Full Face CPAP Mask - soft cloth mask! You asked and Circadiance has delivered the new SleepWeaver Full Face Mask and Headgear. Full Face PAP users can now turn to the cloth technology that many nasal users are already enjoying and raving about for the comfort and practical therapy every PAP wear craves. The SleepWeaver line of soft cloth masks has amazed wearers with the soft touch, lightweight feel on the face, and the seal delivered in therapy.
The SleepWeaver Anew Soft Cloth Full Face Mask material is a durable, soft, high-tech cloth that allows the skin to breathe without the build-up of moisture that can be experienced in silicone masks. The red marks often left behind by other silicone masks will not be an issue with the right fit. The proper fit and seal on the SleepWeaver Anew Soft Cloth Full Face Mask is obtained through inflation of the mask not a tight pull of the straps. Moisture is not allowed to build with the technologically advance material in the SleepWeaver Anew Soft Cloth Full Face Mask.
Every possible option to make the SleepWeaver Anew Soft Cloth Full Face Mask the best comfort and therapy experience has been thought of, researched, and developed. Clear line of vision, 90⁰ Swivel Connection Elbow, easy cleaning, great sealing and fit, soft cloth, and more are all found in this one mask. Experience the revolutionary cloth mask made with the PAP user in mind, the SleepWeaver Anew Soft Cloth Full Face Mask and Headgear. Try it now and feel the comfort.
How to Fit Your SleepWeaver Soft Cloth CPAP Mask to Achieve the Best Seal
Your SleepWeaver Advance Mask is attached to headgear. The headgear has three adjustment points - one on each side of the mask and one on the Head Strap. A swivel connector attaches to the hose from your CPAP or Bi-Level machine.
Fitting the Mask
- Remove your SleepWeaver Advance Mask from the packaging.
- Connect the tubing from your CPAP or Bi-Level machine to the Swivel Connector on the front of the mask.
- Turn on your CPAP or Bi-Level machine at your prescription pressure.
- When the mask inflates, hold the headgear with both hands, position the mask on your nose, and pull the headgear over your head. Make sure that the cup of the mask is centered over your nose, and align the Head Strap to the center of your head.
- Pull the headgear over the back of your head until the Neck Strap is snug just below your ears.
- If you experience leaks, adjust the mask as described on the following page.
- Lie down in your normal sleeping position. If any leaks occur, readjust the mask.
Adjusting for Leaks
If you experience leaks, try these steps:- With your CPAP or Bi-Level machine on and at your prescription pressure, pinch the portion of the mask directly over your nose, pull the mask slightly away from your face, towards your feet, and gently release.
- If you experience leaks from the sides of the mask, adjust the Neck Straps by unhooking the tab from the strap and pulling the straps out to tighten the mask, then re-latching the tab to the strap.
- If you experience leaks into your eyes, adjust the Head Strap.
- At times it is possible to stop leaks and get a better fit by loosening the mask just a bit, then repeating Step 1.
- If the above fails to make a good seal, please contact your home care provider or our Customer Care Department (724-858-2837) for further assistance.
SleepWeaver Mask users have sent us these tips that have made fitting much easier for them.
Tip # 1
I found that if I put the mask on before turning on the blower and making sure my nose was completely in the opening - then turning on the blower and making small tugs if there were any leaks worked best for me. I have never been able to get rid of all the leaks if I start with the blower on. I also went to a light weight hose to keep the weight of the hose from pulling on the Mask.Tip # 2
Tip #3
Hold the material at the top and bottom of the nose opening - with your nose in the hole - all the while pulling the material at the top and bottom in their opposite directions.
Then pull the material the opposite directions left and right - with your nose in the opening still.
Make sure the elastic part is on the center of your forehead.
Then turn the machine back on.
Tip # 4
| Discontinued Status | No |
|---|---|
| Reference Only | No |
| Manufacturer | Circadiance |
| Prescription required | No |

